In Denise Penrose & Ray Lauzanna (eds.) Languages of Design, 1 (1992). Elsevier Science Publishers, Amsterdam: 11-26.
Abstract
An application of formal languages to the representation of musical processes is introduced. Initial interest was the structure of improvisation in North Indian tabla drum music, for which experiments have been conducted in the field as far back as 1983 with an expert system called the Bol Processor, BP1. The computer was used to generate and analyze drumming patterns represented as strings of onomatopeic syllables, bols, by manipulating formal grammars. Material was then submitted to musicians who assessed its accuracy and increasingly more elaborate and sophisticated rule bases emerged to represent the musical idiom.
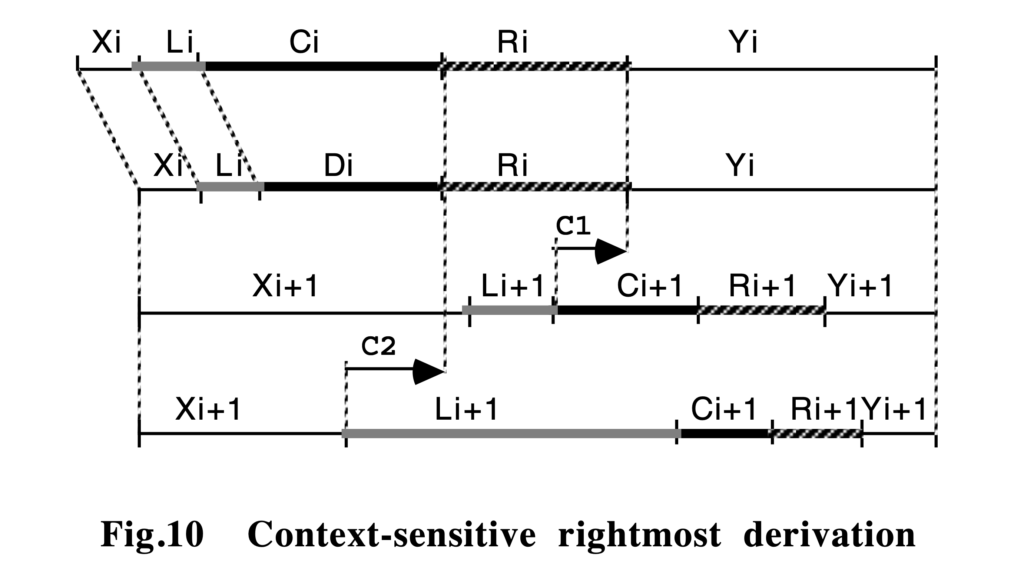
Since several methodological pitfalls were encountered in transferring knowledge from musician to machine, a new device, named QAVAID, was designed with the capability of learning from a sample set of improvised variations supplied by a musician. A new version of Bol Processor, BP2, has been implemented in a MIDI studio environment to serve as a aid to rule-based composition in contemporary music. Extensions of the syntactic model, such as substitutions, metavariables, and remote contexts, are briefly introduced.
Excerpts of an AI review of this paper (Academia, June 2025)
Summary of the Work
The manuscript presents a formal language-based approach to modeling improvisatory and compositional processes in music — particularly North Indian tabla drumming — and highlights the development of the Bol Processor software. The article effectively demonstrates how generative grammars, pattern languages, and related extensions (e.g., pattern rules, homomorphisms, negative contexts, and remote contexts) can capture the complexity and flexibility of musical form, especially with regard to improvisation. The authors also illustrate the transition from an initial musicological focus in the earlier Bol Processor (BP1) to the more generalized and compositional orientation of BP2, highlighting the system’s role in computer-assisted composition. Throughout, there is a strong emphasis on integrating ethnomusicological insights, computational methods, and practical software design.
Strengths
Comprehensive Description of Formal Methods
The paper provides a thorough explanation of how different grammar types — finite-state automata, context-free grammars, type-0 grammars — are relevant for describing musical forms. This is complemented by examples that clarify the theoretical concepts (e.g., the use of pattern rules to handle repeated sections or “voiced/unvoiced” transformations). These sections effectively detail both traditional and innovative model expansions.
Contextual Application in Ethnomusicology
By applying generative models to North Indian tabla’s “theme-and-variations” structures (qa‘idas), the paper demonstrates how such computational approaches can illuminate facets of an orally transmitted musical tradition. The depth of collaboration with expert musicians and the iterative process of evaluation is indicative of a conscientious ethnographic methodology.
Transition to a Generalized Composition Environment
BP2 goes beyond traditional ethnomusicological applications and can be employed as a computer-aided composition tool for broader musical contexts. The concept of “sound-objects” and flexible time-handling approaches (striated vs. smooth time, time pivots, constraint satisfaction, etc.) make the workflow appealing to composers and researchers interested in generative music systems.
Balanced Presentation of Achievements and Challenges
The paper addresses problems of knowledge transfer, data representation, and the complexity of rule-based systems, providing valuable lessons for future computational musicology projects. It also describes how the QAVAID subsystem attempts to automate knowledge acquisition and inference, thereby removing some of the bottlenecks encountered when manually constructing grammars.
Extensive Reference to Prior Research
A substantial and well-organized reference section places the work in conversation with relevant literature from formal language theory, musicological studies, and AI-based composition systems. The inclusion of theoretical sources (e.g., citations to Chomsky’s hierarchy) and practical references (e.g., manual or shareware availability) underscores the paper’s academic depth and real-world applicability.
Overall Appraisal
This study offers a detailed and innovative account of how formal generative tools can be harnessed to describe, analyze, and produce complex musical structures. By bridging theoretical computer science, ethnomusicological fieldwork, and compositional practice, the manuscript opens possibilities for deeper exploration of music’s syntactic features and creative applications in contemporary composition. Its emphasis on practical software development, evaluated in tandem with expert critiques, positions it as a noteworthy resource for researchers and practitioners at the intersection of musicology, AI, and digital arts.
In Mira Balaban, Otto Laske et Kemal Ebcioglu (eds.) Understanding Music with AI, American Association for Artificial Intelligence Press, Menlo Park CA (1992): 366-400.
Abstract
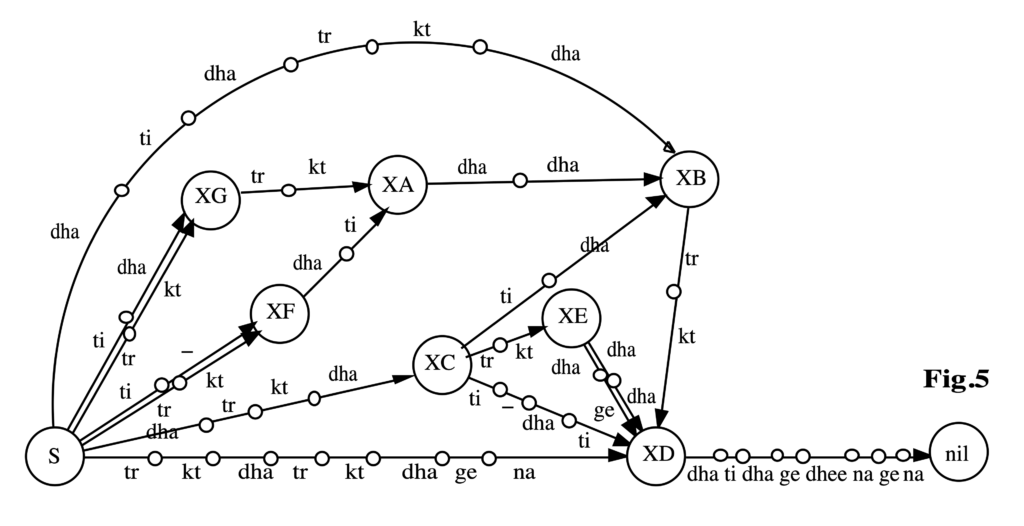
Bol Processor grammars are an extension of unrestricted generative grammars allowing a simple representation of string "patterns", here taken to mean repetitions and homomorphic transformations. These have been successfully applied to the simulation of improvisatory techniques in traditional drum music, using a production-rule system called "Bol Processor BP1". The basic concepts and parsing techniques of BP1 are presented.
A new version of Bol Processor, namely "BP2", has been designed to serve as a aid to rule-based composition in contemporary music. Extensions of the syntactic model, such as metavariables, remote contexts, substitutions and programmed grammars, are briefly introduced.
Excerpts of an AI review of this paper (Academia, June 2025)
Overview and Summary
The authors propose a formalism, called "Bol Processor grammars," designed to capture and simulate performance and improvisatory behaviors in traditional drum music—particularly North Indian tabla. This work presents a detailed account of how their proposed grammar-based system (BP1 and subsequently BP2) manages musical elements such as generative rules, parsing procedures, and higher-order transformations. The authors draw on concepts from formal language theory, specifically incorporating string rewriting, generative grammars of varying types (from context-free to unrestricted), and pattern languages.
The monograph not only discusses theoretical frameworks but also provides implementations and examples relevant to composition, improvisation, and ethnomusicological analysis. By combining standard grammars with additional features (e.g., pattern rules, negative contexts, remote contexts, substitutions, homomorphisms, and a sophisticated weighting mechanism), the Bol Processor aims to model creative aspects of improvisatory traditions.
Contribution and Significance
The paper bridges theoretical computer science (rewriting systems, generative grammars) with ethnomusicological inquiry. This interdisciplinary approach shows how language models can adapt to musical performance traditions, especially where oral transmission prevails.
The authors introduce extensions to classical Chomsky hierarchies by incorporating string pattern languages and homomorphisms specifically tailored for music composition and analysis. This advancement is especially valuable to those researching computational musicology or algorithmic composition.
By providing practical implementation details and guidelines (e.g., subgrammars, weighting rules, context-sensitive substitutions), the study conveys a clear path for others looking to model or simulate improvisational processes.
Strengths
Clarity of Theoretical Underpinnings: The text carefully explains the fundamentals of generative grammars and pattern languages, ensuring that readers unfamiliar with formal language theory can still follow the rationale behind the Bol Processor model.
Comprehensive Examples: The inclusion of worked-through grammar listings, detailed parsing traces, and real-world musical segments highlights an applied perspective. Readers can see exactly how the rules operate on concrete musical materials.
Interdisciplinary Integration: The manuscript thoughtfully weaves together computational linguistics, ethnomusicology, and composition, offering a unique perspective to each discipline.
Generative and Analytical Capacities: Emphasizing both the generation of new musical variations and the parsing of existing performances demonstrates the system’s two-fold utility: it supports creative composition while providing a framework for empirical analysis.
Areas for Further Development
Handling of Larger-Scale Form: While the paper addresses theme-variation structures, the methodology could be extended to more extensive global forms or multi-sectional pieces. More elaboration on how the grammar might manage nested forms or very long structures would strengthen the approach.
Quantitative Evaluation: The text provides evidence of successful modeling but could benefit from additional discussion of how correctness or “musical plausibility” is systematically tested, beyond anecdotal or interactive sessions with experts.
Comparisons with Other Systems: A more in-depth comparison with existing computational music systems that also employ generative grammars (e.g., purely context-free or Markov-based approaches) might deepen an understanding of the Bol Processor’s unique contributions.
Readability and Presentation
The writing is clear and consistently structured, especially around the discrete sections (introduction, pattern rules, parsing, and advanced features in BP2). Diagrams and grammar listings are helpful, though further clarifying annotations in some figures could assist readers less familiar with formal notation.
The appendices excel in presenting extended examples and step-by-step parses, adding transparency to the methods. This style of presentation ensures reproducibility and offers insights into how to adapt or modify the system for other musical styles.
Potential Impact on the Field
The system has apparent implications not just for tabla and other percussion traditions but for any domain where complex variations can be expressed in a rule-based manner. Likewise, composers working with algorithmic or computer-aided composition may discover a robust set of techniques for shaping variation, texture, and form. Researchers in ethnomusicology might find new analytical tools for uncovering systematic elements in improvisational practices.
Overall, the work stands as a thorough exploration of generative and parsing approaches tailored to music, illustrating how computational models can deepen understanding of both fixed and improvised musical structures.
Computers and the Humanities (1989), 23, 3: 119-214
Abstract
In experimental research into percussion ‘languages', an interactive computer system, the Bol Processor, has been developed by the authors to analyse the performances of expert musicians and generate its own musical items that were assessed for quality and accuracy by the informants. The problem of transferring knowledge from a human expert to a machine in this context is the focus of this paper. A prototypical grammatical inferencer named QAVAID (Question Answer Validated Analytical Inference Device, an acronym also meaning ‘grammar' in Arabic/Urdu) is described and its operation in a real experimental situation is demonstrated. The paper concludes on the nature of the knowledge acquired and the scope and limitations of a cognitive-computational approach to music.
Excerpts of an AI review of this paper (Academia, June 2025)
Summary
This paper explores a novel approach to modeling North Indian tabla drumming as a “percussion language” by applying formal language theory, machine learning, and interactive generative/analytic computer methods. The authors discuss two systems— Bol Processor and QAVAID — that each plays a distinct role in analyzing and generating rhythmic patterns (termed “sentences”) under the guidance of expert informants. They examine how knowledge is incrementally acquired and formalized as a grammar, how alternative segmentations can be evaluated, and how probabilistic modeling may be employed to generate original musical sentences for expert evaluation. The work’s ethnomusicological perspective unites computational formalization with the real-world practice of tabla improvisation and teaching, raising broader questions about the nature of knowledge transfer between human expert, machine learner, and cultural context.
Contribution and Strengths
Interdisciplinary Framework
The paper positions itself at the intersection of musicology, cognitive science, computational linguistics, and ethnography. This breadth underscores the complexity of “music as language” and effectively highlights the idea that music may be formally scrutinized with methods akin to those in computer science.
Formal Language Techniques
By grounding the analysis in the Chomskian hierarchy (regular and context-free grammars) and referencing Gold’s concept of “identification in the limit,” the authors tie their ethnomusicological observations to well-established theoretical underpinnings. These connections help clarify why a systematic, incremental approach to grammar inference is suitable for modeling the improvisational components of North Indian tabla drumming.
Attention to Vocabulary and Segmentation
The discussion on how the system learns segmentation and defines “words” in the drumming lexicon is illuminating. Though segmenting tabla phrases is not analogous to segmenting words in spoken languages, the authors show how incremental analysis can propose, refine, or discard potential lexical boundaries in a principled manner.
Interactive and Incremental Learning
A significant feature is the interactive model: the system generates output strings that are validated or rejected by the human informant, thereby triggering incremental adjustments to the grammar. This mimics student-teacher interactions and demonstrates a strong attempt to reflect authentic learning and teaching processes.
Probabilistic Aspect
Introducing stochasticity in synthesis breaks from purely deterministic methods. It points to a more realistic reflection of the ways in which live performance might involve creative, non-deterministic choices, while maintaining constraints guided by the learned grammar.
Methodological Observations
Data Representation
The authors clearly define the symbol inventory (bols like dha, ge, ti, etc.) and acknowledge the complexity of how these symbols relate to sonic events. By limiting the approach to frequency-based segmentation and grammar inference, the system operating within a “text presentation protocol” remains suitably rigorous.
User–System Dialogue
Illustrations of the QAVAID question–answer mechanism highlight practical aspects of grammar construction. This is valuable for explaining how the system backs up, modifies rules, or infers new chunks based on partial disagreements from the expert and how it tests repeated merges or segmentations for consistency.
Scalability Considerations
The experiments presented involve a limited number of examples. The authors note computational constraints and carefully frame how repeated merges, lexical expansions, and negative examples (machine outputs the user rejects) unfold in realistic time on a microcomputer. This transparency about performance considerations is commendable.
Comparison to Existing Tools
While the authors reference formal language theory, it could be helpful to situate the QAVAID approach more explicitly alongside other grammar-inference systems (or music cognition models) in terms of efficiency and success rates. This might provide additional context about how QAVAID’s tight-fit methodology differs from existing machine-learning strategies in music.
Suggestions for Future Work
Integration of Connectionist Approaches
A deeper investigation into how sub-symbolic learning algorithms (e.g., neural networks) might coexist or complement a symbolic grammar-inference approach could shed light on whether deeper hierarchical or pattern-based musical structures can be discovered automatically.
Temporal and Metric Awareness
Incorporating real-time constraints, including an explicit model of cycle boundaries and tempo variations, might enable QAVAID or a successor system to handle performances that deviate subtly from rigorously measured durations.
Generative Evaluation
Extending the system to produce longer performance sequences and evaluating how coherent or context-appropriate they sound in extended improvisation might reveal new facets of pattern synergy that short examples do not expose.
Cross-Cultural Applicability
The strategies deployed here for tabla might prove adaptable to other deeply mnemonic or improvisatory musical traditions (e.g., West African drumming, Middle Eastern percussion). Investigating how the model generalizes across cultures could underscore the method’s versatility and reveal new limitations.
Conclusion
By merging formal language theory with ethnomusicological fieldwork and machine learning, the authors propose a powerful model for capturing core aspects of tabla improvisation. The framework encourages close human–computer collaboration through dynamic questioning and incremental grammar building. This approach not only advances a cognitive-computational perspective on music but also opens a pathway for further inquiries into cross-cultural applications, time-sensitive performance modeling, and creative composition within implicit musical grammars.
Time and Musical Structures. Interface, 19 (2-3): 107-135.
Abstract
A theoretical model is introduced, by the aid of which descriptions of sequential and concurrent processes may be built taking account of the sophistication and generality of contemporary musical concepts. This is achieved through an independent and unrestricted mapping between physical time and a symbolic set of dates. Sequential structures are considered first, then the nature of this mapping and its practicle implementation in a real-time synthesizer are discussed. Polymetric structures are introduced and a method is outlined for mapping events to symbolic dates when concurrent processes are incompletely described.
Excerpts of an AI review of this paper (Academia, June 2025)
Overview
This manuscript explores a theoretical framework for representing musical time in both sequential and concurrent processes. By mapping physical time onto symbolic dates, the work provides a general approach for dealing with complex musical concepts such as polymetric structures, concurrency, and symbolic durations. The study incorporates references to prior research on formal music modeling, concurrency theory, automata, and the notion of sieves (in the sense introduced by Xenakis). Overall, it offers a systematic perspective on how time representation can be divorced from strict physical durations, allowing compositional and analytical models to operate at a more abstract level.
Strengths
Conceptual Clarity: The author articulates the distinction between physical time and symbolic time convincingly. This two-tiered approach — structure of time versus in-time structures — makes the discussion transparent and applicable to a wide array of musical contexts.
Breadth of Coverage: The work addresses not only sequential but also concurrent processes. The sections on polymetric structures demonstrate that this model can handle overlapping and simultaneous events without losing consistency.
Technical Rigor: The paper’s formal descriptions — particularly in Sections 7 and 9 — are thorough and precise. The definitions and functions (e.g., mappings θ, φ, or the equivalence classes for fractional time) demonstrate a strong mathematical foundation.
Practical Implementations: References to real-time synthesizers (e.g., SYTER), and examples of how symbolic time can be converted back to physical time, highlight pragmatic considerations. The manuscript shows how these theoretical insights can be implemented in actual music software (HyperBP, MIDI integration, etc.).
Well-Selected References: The author connects their work to established theories (Boulez, Xenakis) and more contemporary AI-related approaches (Mazurkiewicz, Chemillier). This positions the study within a lineage of relevant ideas, supporting both the novelty and validity of the research.
Clarity and Organization
The paper is clearly written and systematically organized. Definitions are introduced in a logical sequence, and the illustrative examples — even though dense — provide concrete applications of the formalism. Some sections (such as 7.1–7.2 and 9) might benefit from additional examples to ensure that readers not fully immersed in formal mathematics can follow the transformations step by step.
Significance of the Work
By bridging abstract mathematical formalisms and computer implementation details, the manuscript offers a valuable methodology for musicians, composers, musicologists, and AI researchers. It can inform broader discussions on how to handle simultaneous events, phrase-bound time manipulations, and adaptive tempo settings within algorithmic composition and music performance systems.
Conclusion
This study presents a thorough and carefully reasoned framework for symbolic time representation and manipulation in music. It demonstrates clear potential and is situated well in the continuum of existing formal approaches to musical time. With additional real-world usage examples and deeper comparisons to established concurrent process paradigms, the manuscript could become even more impactful. The core contribution — namely, an adaptable, polymetric-capable time representation — addresses a fundamental issue in contemporary music computing, paving the way for innovative applications in both compositional and performance systems.
Live coding is a performing art form centred on writing code and using interactive programming in an improvisational way. From March 2025, this practice is possible on all Bol Processor implementations: MacOS, Windows, Linux and the standalone application on Mac.
Practically speaking, live coding on the Bol Processor is possible when improvising continuously in real time MIDI. The project is a grammar, and the following real-time changes are currently possible:
Edit and save the grammar. The updated version will be immediately reloaded and restarted.
Edit and save the settings. The updated version will be immediately reloaded and applied to the next productions.
Save another grammar in the same session. It will be loaded immediately to replace the current one and production will restart. The settings (and alphabet, if applicable) will be included.
How to do it
Set the grammar in Non-stop improvize mode.
Check the Follow grammar(s) and (optional) Follow settings options at the bottom of the settings form. The Track changes option will keep a record of grammar and settings changes.
Do the same for all grammars used in the improvisation.
Click PRODUCE ITEM(s) on the first grammar.
During the performance, clicking SAVE on any of the grammars will save its changes, load it and run it in place of the current one. Its settings and alphabet will also be automatically included.
The following is a trivial example with no musical relevance. It is intended to test the Bol Processor's technical ability to quickly handle changes in a conversational setup.
Two grammars, namely "-gr.livecode1" and "-gr.livecode2", contain a single inference from S to a polymetric expression:
In "-se.livecode1" and "-se.livecode2", the Non-stop improvize and Follow grammar(s) options have been checked.
First run "-gr.livecode1" which is a plain repetition of a musical motif borrowed from Oscar Peterson. Click SAVE to check that it restarts the performance. Then modify the grammar, adding or deleting notes, and click SAVE to check that the modified version will be played immediately.
If the Follow settings option is checked, you will notice that changing a setting, such as tempo, and clicking SAVE to “-se.livecode1” will be reflected in the performance. However, the effect is not immediate, as the machine must first play the items stored in the output buffer. We're working on a way to make changes immediate while maintaining the continuity of the performance.
Listen to a possible result (!):
Grammars "-gr.livecode1" and "-gr.livecode2" in a 'conversational" mode
It is worth noting that the two grammars use different note conventions, namely English in "-gr.livecode1" and Italian/French in "-gr.livecode2".
A more complex example
Let us now mix two complex grammars: "-gr.Mozart" and "-gr.trial.mohanam", which are in the "ctests" folder. Check the Non-stop improvize and Follow grammar(s) options in their settings and start improvising on one of them. Then click SAVE to change the grammar or reload the current one.
In fact, you can use more than two grammars for this exercise. You can also include a grammar that is not in the Non-stop improvize mode, so it will end the performance.
The "-gr.Mozart" grammar uses the French note convention whereas the "-gr.trial.mohanam" grammar uses the Indian convention. The latter also uses an alphabet file "-al.trial.mohanam". The merge is technically satisfactory as you can hear:
Work in progress
We're working on three limitations that seem evident in the context of live coding:
React immediately to changes in the settings.
Create an option to react to changes (or updates) of a grammar only at the moment when an entire element has been sent to MIDI.
When loading a grammar, if the grammar is not valid, the improvisation should continue with the previous grammar.
More suggestions are sure to come as feedback from artists working with live coding. These will give way to challenging developments!
In the standard use of the Bol Processor, all data is stored in the "htdocs/bolprocessor" folder created by MAMP or XAMPP, or "Contents/Resources/www" with the standalone "BolProcessor.app" application on MacOS. Read the installation instructions for more details.
This packaging is acceptable in most cases because Bol Processor data is basically made of text files that do not take up much space.
However, there are a number of reasons why a user might want to store data in locations other than this folder:
Need for additional space
Avoid storing data on the startup disk
Sharing data with other applications and other users
Sharing data via a cloud device (e.g. DropBox).
A procedure for moving the entire "bolprocessor" folder is described in the installation instructions: for example, in the MacOS environment. Unfortunately, as of today, the relocated installation does not work on MacOS with XAMPP after a reboot, unless the "BolProcessorInstaller.pkg" installer is run again. The same problem might exist in both Windows and Linux environments where MAMP or XAMPP is used.
In fact, there is not much interest in relocating the entire "bolprocessor" (or "Contents/Resources/www") folder. Moving data folders outside this folder will suffice. This tutorial will tell you how to do this.
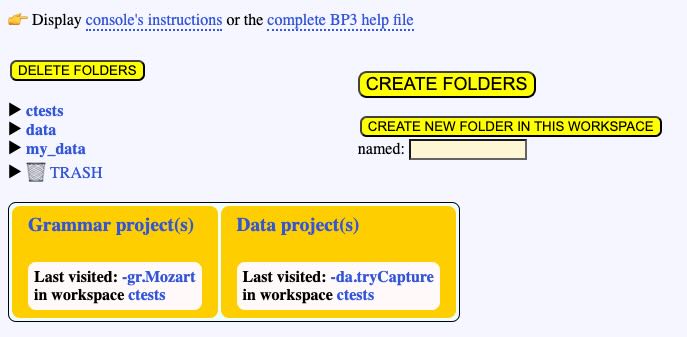
The first time you install the Bol Processor, the "bolprocessor" (or "Contents/Resources/www") folder contains a unique folder called "ctests" for storing data. This folder contains examples that are updated when a new version is installed. However, you can use it to store new projects, new subfolders, etc., which will not be affected by new versions.
You can also create your own folders (and subfolders) at the same level as "ctests". The interface is designed for the creation, moving and deletion of folders and files within the "bolprocessor" (or "Contents/Resources/www") folder. Always use the interface. Creating a folder (or a file) via the Finder or File Manager may not work, especially if the Bol Processor is run with XAMPP, because the owner may be different from the Apache server's identity. For geeks:XAMPP runs as "daemon" while the Finder runs as your personal identity.
Creating folders and files without using the Bol Processor interface may result in "permission errors" when a file is saved. Indeed, there are workarounds, for those familiar with shell scripts, for example the "change_permissions.sh" script designed for Linux and MacOS. But this is not a pleasant way to use the Bol Processor…
In short, always create folders using the CREATE FOLDERS function in the interface. Once created, they can be moved (even with the Finder or File Manager) within the "bolprocessor" folder, and even renamed. The Bol Processor will always recognise them as its own.
Below is an example of two folders called "data" and "my_data" created at the same level as "ctests":
Now, how can we move a folder outside the "bolprocessor" (or "Contents/Resources/www") folder? Once we've moved it, the interface no longer shows it. For example, let us do this with "my_data". (The folder may be empty or contain other folders and files.)
Using the Finder in MacOS, or copy/paste in Windows and Linux, we move "my_data" to the desired location, for example a "MUSIC" folder at the root of an external drive called "EXT". Make sure that this location accepts read/write operations.
At this point, there is no more "my_data" in "bolprocessor" (or "Contents/Resources/www"), or we delete it using the DELETE FOLDERS button. You can't delete "ctests" with this delete function.
To make "my_data" visible again from its remote location, we need to create a symbolic link. Unfortunately, the Bol Processor's interface cannot do this due to security restrictions. I've spent hours with a chatbot trying to find a workaround!
In MacOS and Linux, the symbolic link is created from a (Unix) Terminal. In Windows, you will use the Windows PowerShell (admin).
This procedure doesn't work with aliases created by the Finder in MacOS. You really need to use symbolic links.
MacOS or Linux
Open the Terminal (in the Applications folder) and point it to the "htdocs/olprocessor" (or "Contents/Resources/www") directory. For those unfamiliar with Unix commands, you will need to type "cd " (followed by a space) and drag "bolprocessor" (or "www") to the end of this command, then press "return". You can type the instruction "ls -al" to see the contents of "bolprocessor" (or "www"), which contains "ctests", and more.
Suppose that your"MUSIC" folder is on disk "EXT" and you want to link to the relocated "my_data" folder. Type this command:
ln -s /Volumes/EXT/MUSIC/my_data my_data
This will create the "my_data" symbolic link pointing to the remote "my_data" folder. Check that the link has been created by typing "ls -al".
Depending on the disk or disk area used to store relocated data, you might encounter problems due to MacOS access restrictions, especially if the System Integrity Protection (SIP) is enabled.
If you are using a recent installer (as of 3 Feb 2025) and a XAMPP Apache server, the 'daemon' identity used by XAMPP is automatically added to the 'admin', 'wheel' and 'staff' groups which are commonly used by the Finder.
There are probably fewer restrictions with MAMP because this server runs under your personal identity, and file owners are set to that identity.
Windows
Right-click the start icon at the bottom left of the screen, and select Windows PowerShell (admin). Then type the following command to create a symbolic link — in fact a junction (/J instead of /D):
If you are using XAMPP, replace "\MAMP\" with "\xampp\".
Depending on the disk or disk area used to store relocated data, you may encounter issues due to Windows 10 access restrictions.
For example, moving your data to the OneDrive directory won't work by default. If you must keep the target folder inside OneDrive, you must disable the synchronisation of your files:
Open OneDrive Settings
Go to "Choose folders"
Uncheck your data folder(s).
Return to the Bol Processor
Now, the BolProcessor interface will show "my_data" as if the folder was in "bolprocessor". If it doesn't, make sure that the paths used to create the link were correct.
Make sure that you can create and save data in the relocated folder. Welcome to shared projects!
This page is intended for developers of the Bol Processor BP3 (read installation). It is not a formal description of the algorithms carried by the console's C code, but rather an illustration of their management of musical processes, which may be useful for checking or extending algorithms.
When the Bol Processor produces MIDI material (real-time or files), each note is associated with two events: a NoteOn at its beginning and a NoteOff at its end. Additional parameters are its velocity (range 0 to 127) and its MIDI channel (range 1 to 16).
When a keyboard instrument is used to produce the sound, each NoteOn will press a key at the appropriate location. By default, note C4 (in English notation) will press key #60. A NoteOff of the same pitch will release the key.
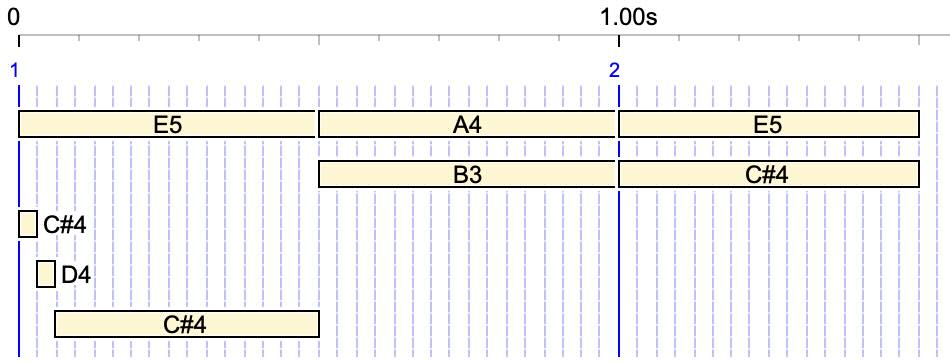
All examples on this page can be found in the "-da.checkNoteOff" project. NoteOn/NoteOff tracking can be enabled by selecting this option in the "-se.checkNoteOff" settings of the project.
Two (or more) consecutive NoteOns of the same note and the same channel should not be sent to a MIDI instrument. Nevertheless, the attacks of C4, which occur at the 1.00 s and 2.00 s times in this example, should be audible. To achieve this, they are automatically preceded by a NoteOff.
The list of NoteOn/NoteOff events is as follows:
NoteOn C4 channel 1 at 0 ms NoteOff C4 channel 1 at 1000 ms NoteOn C4 channel 1 at 1000 ms NoteOff C4 channel 1 at 2000 ms NoteOn C4 channel 1 at 2000 ms NoteOff C4 channel 1 at 5000 ms NoteOn D4 channel 1 at 5000 ms NoteOff D4 channel 1 at 6000 ms
This feature is not necessary for the creation of Csound scores. The score generated by this example is as follows:
A large random time (50 ms) has been chosen to make the graphs clearer. In general, _rndtime(x) is used for a less mechanical rendering of simultaneous notes, with 10 to 20 ms being the recommended value for keyboard instruments.
Errors would occur if the order of fast notes were reversed. However, this does not happen because the timing of the NoteOns in fast movements is not made random:
The same excerpt with 50 ms random time, except on the starting fast sequence C#4 D4 C#4.
Below we will deal with the elimination of some NoteOns except in fast movements: read Dealing with fast movements.
The following example is the (slowed down) first measure of François Couperin's Les Ombres Errantes (1730) (read page) with a quantization of 50 ms and a randomisation of 50 ms:
First measure of François Couperin's Les Ombres Errantes (1730) with quantization and randomised NoteOns
These relatively high values have been chosen to show that the order of notes is respected in fast movements. Quantization (typically 20 ms) is generally necessary to play a complicated polymetric structure, such as an entire piece of music. Once the times of the NoteOns have been calculated and rounded to the quantization grid, they are given small random changes. However, notes in a fast motion (C5 B4 C5) and the first note after this motion (B4) are excluded from the randomisation.
Duplication of notes in a MusicXML score
When several MIDI channels are used, we can imagine that each of them controls a separate keyboard, or that the channels are combined to control the same keyboard. The first case is called Omni Off Poly mode and the second case is called Multi mode (see details).
Importing music from MusicXML scores often creates a Bol Processor score that uses different MIDI channels (or Csound instruments). If the music is sent on a single channel or played by an instrument in Multi mode, there may be overlaps for the same note assigned to different channels.
This situation is also found in music imported from MusicXML scores (see details of this process). For example, again the first measure of François Couperin's Les Ombres errantes:
Original staff (source) - Creative Commons CC0 1.0 Universal
This (slowed down) interpretation is microtonally adjusted according to the Rameau en si bémol temperament (see explanation).
Notes at the bottom of the staff: Eb4, D4, C4 are shown both as quarter notes and as eight notes. As this dual status cannot be managed in the MusicXML score, they are duplicated (link to the XML score). This duplication is necessary for the conventional representation of the staff.
The staff would look less conventional if the redundant eight notes Eb4, D4, C4 were suppressed (link to the modified XML score):
Modified staff drawn by MuseScore 3
The output of the Bol Processor from the original XML score is as follows, with duplicate notes clearly marked:
A sound-object display of the Bol Processor's interpretation of the MusicXML score. Note that the durations of C5 and Eb5 are extended to allow slurs to be played correctly (see explanation)
The Bol Processor score is an overlay of three lines created by sequentially interpreting the XML score:
Eliminating the redundant eight notes Eb4, D4, C4 would require a backtracking to modify the second line when reading the notes of the third line. But this complicated process is not necessary because the Bol Processor handles duplicate notes correctly. The following piano roll shows this:
A piano roll display of the Bol Processor's interpretation of the MusicXML score.
This rendering requires a proper control of NoteOffs and NoteOns. This can be done in several ways. (For geeks) we present the old method (before version BP3.2) and the new one.
The old method
Events listed by the PianoTeq synthesiser
The image on the right shows the beginning of a sequence of MIDI events played by a synthesiser. (The date "6.802" is actually time 0.) Events are distributed on separate MIDI channels to allow for microtonal adjustments by the pitchbender. (Pitchbender messages are not displayed.)
The performance starts with a NoteOnC5, then a NoteOnEb4 at the same date. However, another NoteOnEb4 is required at the same time. However, two NoteOns of the same note and the same channel should not be sent to a MIDI instrument. so, a NoteOffEb4 is sent just before the second NoteOnEb4, all at the same time. In this way, the first NoteOn/NoteOffEB4 sequence is not audible because its duration is zero.
At time 1 second, a NoteOnC4 is sent as expected. The sound-object graph shows that the Eb4 eight note is ending, but no NoteOff is sent because the Eb4 quarter note should continue to sound. The NoteOffEb4 will only occur at time 2 seconds.
The new method
In the old method, sequences of NoteOn and Noteoff of the same note could be sent to the synthesiser at the same time. This worked because the NoteOn/Noteoff order was respected, and they could be processed by the synthesiser even if the times were (almost) identical. The new method aims to eliminate this case.
To achieve this, the machine calculates "MaxDeltaTime", an estimate of the maximum time between two NoteOns (of the same note and channel), beyond which they should be interpreted as separate events. If dates are randomised by _rndtime(x), then MaxDeltaTime is set to 2 times x. Otherwise it is set to 2 times the quantization. If there is no quantization and no randomisation, it is set to 20 milliseconds.
A Trace NoteOn/Noteoff option can be selected in the new version to display the sequence of notes along with indications of decisions made to send or keep a NoteOn message. Here is the sequence for the first measure of Couperin's Les Ombres Errantes randomised to ± 50 ms and quantified to 20 ms. Therefore, we expect MaxDeltaTime to be set to 100 milliseconds.
NoteOn Eb4 channel 1 at 2 ms NoteOn C5 channel 1 at 14 ms ? Eb4 channel 1 at = 27 ms, last = 2, delta = 25 > 100 ms ¿ NoteOn G4 channel 1 at 1031 ms ? C5 channel 1 at = 1955 ms, last = 14, delta = 1941 > 100 ms ¿ NoteOff C5 channel 1 at 1955 ms NoteOn C5 channel 1 at 1955 ms NoteOn D4 channel 1 at 1995 ms NoteOff Eb4 channel 1 at 2002 ms ? D4 channel 1 at = 2030 ms, last = 1995, delta = 35 > 100 ms ¿ NoteOff G4 channel 1 at 2031 ms NoteOn B4 channel 1 at 2159 ms ? C5 channel 1 at = 2316 ms, last = 1955, delta = 361 > 100 ms ¿ NoteOff C5 channel 1 at 2316 ms NoteOn C5 channel 1 at 2316 ms NoteOff B4 channel 1 at 2326 ms NoteOff C5 channel 1 at 2483 ms NoteOn B4 channel 1 at 2497 ms NoteOn F4 channel 1 at 2961 ms NoteOn C4 channel 1 at 3951 ms NoteOff F4 channel 1 at 3961 ms NoteOff D4 channel 1 at 3995 ms NoteOff B4 channel 1 at 3997 ms NoteOn Eb5 channel 1 at 4031 ms ? C4 channel 1 at = 4040 ms, last = 3951, delta = 89 > 100 ms ¿ NoteOn Eb4 channel 1 at 4981 ms NoteOff C4 channel 1 at 5951 ms NoteOff Eb4 channel 1 at 5981 ms NoteOff Eb5 channel 1 at 6431 ms
This trace shows that the machine compared the time interval between successive NoteOns of the same note and channel. On the green line, this interval was 25 ms, which is less than 100 ms, so the Eb4NoteOn (of the duplicated note) was discarded. On the red lines, the intervals were greater than 100 ms and the NoteOns were played.
Channel information is irrelevant, as microtonal adjustments assign a specific channel to each note and its pitchbend adjustment. However, this selection of NoteOns is made prior to the assignment of specific channels for microtonal corrections.
Dealing with fast movements
The new method (BP3.2.0 and higher) eliminates NoteOns of the same note and channel if they occur in an interval less than MaxDeltaTime. However it takes into account fast movements. For example:
In this example, two different occurrences of C#4 should be separated by less than MaxDeltaTime (100 ms). The following trace shows that the sequence C#4 D4 C#4 (a trill) has been identified as a fast movement, and no time separation condition has been applied:
NoteOn C#4 channel 1 at 0 ms NoteOn E5 channel 1 at 14 ms NoteOff C#4 channel 1 at 31 ms NoteOn D4 channel 1 at 31 ms NoteOff D4 channel 1 at 62 ms NoteOn C#4 channel 1 at 62 ms NoteOn B3 channel 1 at 493 ms NoteOff C#4 channel 1 at 500 ms NoteOff E5 channel 1 at 514 ms NoteOn A4 channel 1 at 531 ms NoteOn E5 channel 1 at 955 ms NoteOn C#4 channel 1 at 983 ms NoteOff B3 channel 1 at 993 ms NoteOff A4 channel 1 at 1031 ms NoteOff E5 channel 1 at 1455 ms NoteOff C#4 channel 1 at 1483 ms
A quantization of 20 ms may not be desirable for rendering fast movements such as:
{1/16, C4 - E4 F4} {15/16, G4 A4 B4}
The graphic shows that notes E4 and F4 have been assigned the same time (60 ms)
If the quantization is set to 10 ms, the differentiation of the timings is retained:
NoteOn C4 channel 1 at 0 ms NoteOff C4 channel 1 at 15 ms NoteOn E4 channel 1 at 31 ms NoteOff E4 channel 1 at 46 ms NoteOn F4 channel 1 at 46 ms NoteOff F4 channel 1 at 62 ms NoteOn G4 channel 1 at 62 ms NoteOff G4 channel 1 at 375 ms NoteOn A4 channel 1 at 375 ms NoteOff A4 channel 1 at 687 ms NoteOn B4 channel 1 at 687 ms NoteOff B4 channel 1 at 1000 ms
Installing the Bol Processor (BP3) does not require any programming skills. Just download and run the installers for MacOS and Windows, or the installation scripts for Linux. The same installers and scripts can be used to upgrade an existing BP3 without any loss of data or change to the settings.
On MacOS the procedure is very simple: run the installer to create/upgrade the standalone "BolProcessor.app" application. BP3 currently runs on macOS Tahoe version 26 (and older versions).
👉 You can also run the Bol Processor BP3 on MacOS with a HTML/PHP server. Features are identical for both options.
On Windows and Linux, you still need to install a local Apache HTML/PHP server on your desktop computer. This server runs a dedicated web service that is restricted to your computer. Only PHP (with its GD Graphics option) needs to be running, as no database is used by the Bol Processor interface.
On MacOS and Windows we recommend MAMP or XAMPP, both of which are Apache servers with pre-installed features. On Linux, XAMPP is the only choice. This part of the implementation is described on the pages that show the installation of BP3 in the different environments, see below.
Once you've installed MAMP or XAMPP, installing Bol Processor is almost a one-click process.
A help file will be compiled when running the Bol Processor. You can read a preview.
MacOS users can quickly do the installation using a (notarized) installer called BolProcessorInstaller.pkg. Follow instructions on this page.
Windows users can quickly do the installation using a (certified) installer called BolProcessorInstaller.exe. Follow instructions on this page.
Linux users can quickly do the installation using dedicated scripts. Follow instructions on this page.
👉 Once you've installed the Bol Processor, visit this page to familiarise yourself with how to use it.
The file structure of your installation
👉 Only for geeks!
The following is the file structure when running the Bol processor with an Apache HTML/PHP server. If you have installed the standalone "BolProcessor.app" application, the structure is made visible by selecting "Show Package Contents" and moving down to "Contents/Resources/www", which is specific to PHP Desktop.
Let us assume that your installation was successful. It created a "htdocs/bolprocessor" folder.
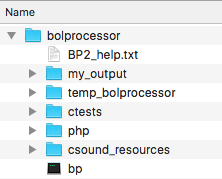
The file structure inside this folder is shown on the left. There is nothing related to Bol Processor outside of this folder.
This image includes "bp" which is the compiled version of the BP3 console for MacOS. The console is called "bp.exe" in Windows and "bp3" in Linux. In Linux, "bp3" will not be visible immediately after the installation because it needs to be created (in a single click) by the compiler. In Windows, "bp.exe" is installed, so that no compilation is required. The same is true for "bp" in MacOS.
The "temp_bolprocessor" and "my_output" folders are automatically created when the interface is run. The contents of the "temp_bolprocessor" folder is cleared of all files/folders older than 24 hours which were created in a different session.
Another folder called "midi_resources" is also created to store the settings for your real-time MIDI input and output ports.
Two additional folders, "csound_resources" and "tonality_resources", are created by the installation and filled with data shared by all projects.
Running the interface will also create "BP2_help.html" in the "php" folder using "BP2_help.txt" as its source.
The "ctests" folder — which we call a workspace — contains sample material used to check the operation of Bol Processor and to illustrate some musicological issues. It is updated by the installation scripts each time you upgrade to a new version.
If you create new material in the "ctests" workspace it won't be deleted by upgrades. However, if you modify files that come from the distribution, they will revert to the current distribution version on each upgrade. It is therefore a good idea to keep a copy of the "ctests" folder, as you are likely to modify some of its data files while using the program. You may want to restore the original versions later. You can also create your own workspaces (in tree structures) using your computer's file manager.
GitHub repositories
👉 Only for geeks!
Accessing GitHub repositories is not a reliable method for installing or updating the Bol Processor. The following information is provided for reference only. The files labelled "last version" are the ones downloaded by the installer scripts.
Files for the Bol Processor project are stored in three repositories:
The core of the Bol Processor, in all its versions, is an inference engine capable of generating 'items' — strings of variables and terminal symbols — treated like the score of a musical work. The inference engine does this through the use of rules from a formal grammar.
In its initial versions (BP1 and BP2), the inference engine was also able to analyse a score — for example, a sequence of drum beats — to check its validity against the current grammar. This feature is not (yet) implemented in BP3.
A brief presentation of grammars
The grammars used by the Bol processor are similar to those described in formal language theory with a comprehensive layout:
Rules can be context-sensitive, including with remote contexts on the left and the right.
Rules can contain patterns of exact or pseudo repetitions of fragments. Pseudo repetitions make use of transformations (homomorphisms) on the terminal symbols.
A terminal symbol represents a time object which can be instantiated as a simple note or a sound object, i.e. a sequence of simple actions (MIDI messages or Csound score lines).
The grammars are layered — we call them 'transformational'. The inference engine first does everything it can with the first grammar, then jumps to the second, and so on.
The “produce all items” procedure
Grammars can produce infinite strings of symbols if they contain recursive rules. This is of no practical use in the Bol Processor, as it will eventually lead to a memory overflow. When recursive rules are used, control is exercised by dynamically decreasing rule weights or using 'flags' to invalidate recursivity.
This means that the machine only generates finite languages within its technical limitations. Theoretically, it should be able to enumerate all productions. This is the aim of the "produce all items" procedure. In addition, identical items are not repeated; to this effect, each new item is compared with the preceding ones.
For geeks:This is done by storing productions in a text file which is scanned for repetitions. The efficiency of this method depends on the technology of the working disk. A SSD is highly recommended!
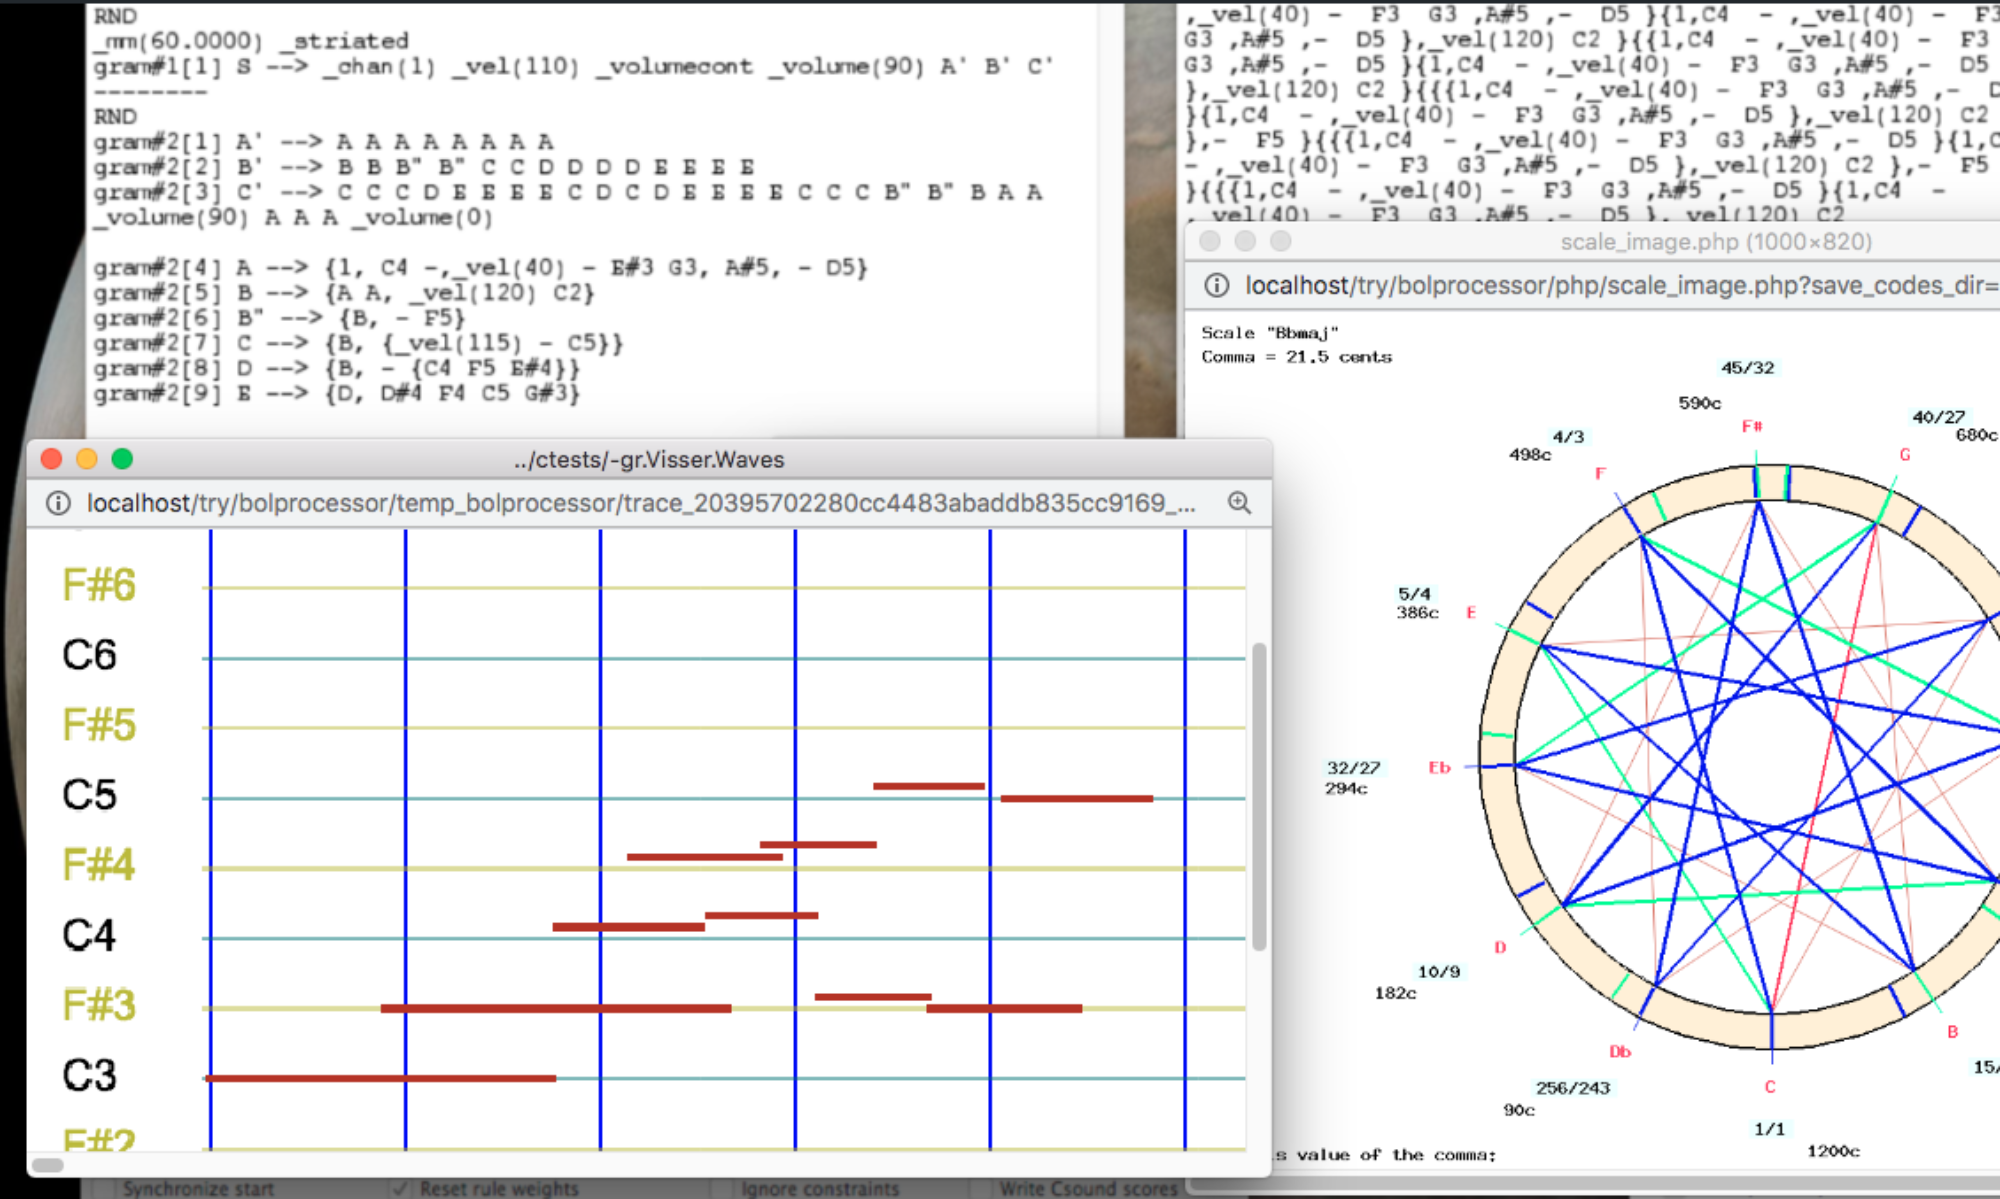
A simple example
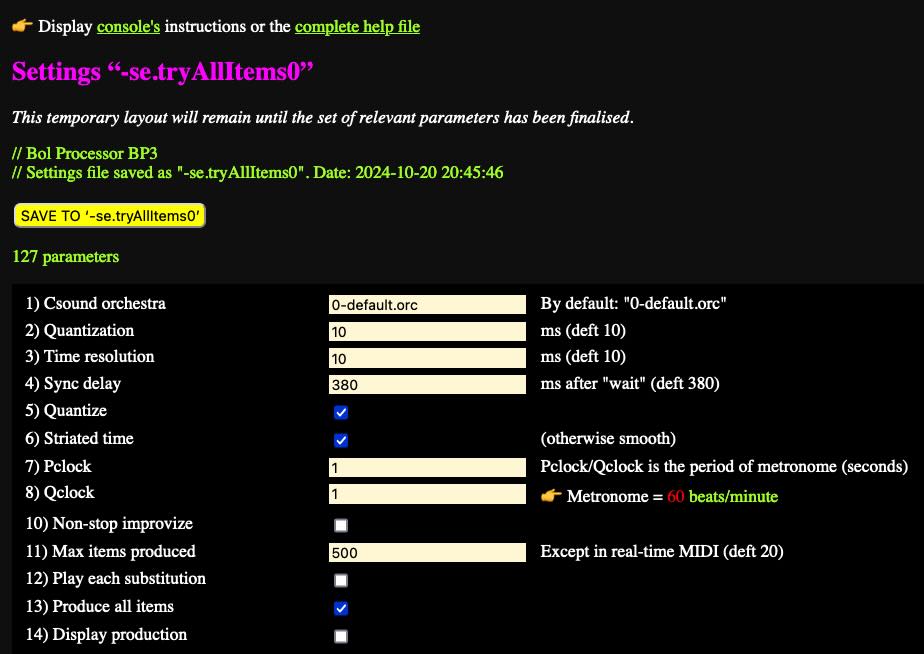
Let us start with a very simple grammar "-gr.tryAllItems0" which is made up of two layers of subgrammars:
-se.tryAllItems0 -al.abc
RND gram#1[1] S --> X X X gram#1[2] S --> X X ----- RND gram#2[1] X --> a gram#2[2] X --> b
The RND instruction indicates that the rules in the grammar will be selected randomly until no rule applies. The first subgrammar produces either "X X X" or "X X", then the machine jumps to the second subgrammar to replace each 'X' with either 'a' or 'b'.
In the " Produce all items" mode, rules are called in sequence, and their derivations are performed by picking up the leftmost occurrence of the left argument in the work string.
In the settings of " tryAllItems0 " (see picture), "Produce all items" is checked. A parameter " Max items produced" can be used to limit the number of productions.
The output is set to "BP data file" for this demo, although real-time MIDI, MIDI files and Csound score are possible because 'a' and 'b' are defined as sound-objects. However, the sound output is completely irrelevant with this simple grammar.
Any production that still contains a variable is discarded. This never happens with the " tryAllItems0 " grammar.
The production of this grammar is:
a a a a a b a b a a b b b a a b a b b b a b b b a a a b b a b b
All the steps are shown on the self-explanatory trace:
S X X X a X X a a X a a a a a b a X a a a a a b a a b X a b a a b b a X b a a b a b b X a X a a X a a a a a b X a a a a a b a a b a X b a a b a b X a b a a b b a b X X a a X a a a a a b a X a a a a a b a a b X a b a a b b a X b a a b a b b a b X X b a X b a a b a b b X a b a a b b a b b X b b a b b b b X b b a b b b b X b X a b X a b a a b b X b a a b a b b a b b X b b a b b b X b b a b b b b b X X b a X b a a b a b b X a b a a b b a b b X b b a b b b b X b b a b b b b b X X a X a a a b X a a a b a b X b a b b X b a b b b
A pattern grammar
Let us modify "-gr.tryAllItems0" as follows:
-se.tryAllItems0 -al.abc
RND gram#1[1] S --> (= X) X (: X) gram#1[2] S --> X X ----- RND gram#2[1] X --> a gram#2[2] X --> b
The first rule gram#1[1] contains a pattern of exact repetition: the third 'X' should remain identical to the first one. Keeping the pattern brackets, the production would be:
(= a) a (: a) (= a) b (: a) (= b) a (: b) (= b) b (: b) a a a b b a b b
This output shows that the third terminal symbol is a copy of the first. These items can be played on MIDI or Csound, as the machine will remove structural markers. However, structural markers can also be deleted on the display by placing a " _destru" instruction under the "RND" of the second subgrammar. This yields
a a a a b a b a b b b b a a a b b a b b
To become more familiar with patterns (including embedded forms), try "-gr.tryDESTRU" in the "ctests" folder.
A more complex example
Consider the following grammar "-gr.tryAllItems1" in the "ctests" folder:
RND gram#1[1] S --> X Y /Flag = 2/ /Choice = 1/ ----- RND gram#2[1] /Choice = 1/ /Flag - 1/ X --> C1 X gram#2[2] /Choice = 2/ X --> C2 X _repeat(1) gram#2[3] <100-50> /Choice = 3/ X --> C3 X gram#2[4] X --> C4 _goto(3,1) gram#2[5] Y --> D3 Gram#2[6] X --> T ----- RND gram#3[1] T --> C5 _failed(3,2) gram#3[2] Y --> D6
This grammar uses a flag 'Choice' to select which of the rules 1, 2 or 3 will be used in subgrammar #2. Just change its value to try a different option, as they produce the same 'language'. Terminals are simple notes in the English convention: C1, C2, etc.
The flag 'Flag' is set to 2 by the first rule. If 'Choice' is equal to 1, rule gram#2[1] is applied, and it can only be applied twice due to the decrementation. This ensures that the language will be finite.
Rule gram#2[4] contains a "_goto(3,1)" instruction. Whenever it is fired, the inference engine will leave subgrammar #2 and jump to rule #1 of subgrammar #3. If the rule is a candidate, it will be used and the engine will continue to look for candidate rules in subgrammar #3. If the gram#3[1] rule is not applicable, the engine will jump to rule #2 of subgrammar #3, as instructed by "_failed(3,2)". In fact, these _goto() and _failed() instruction have no effect on the final production, but they do modify the trace.
If 'Choice' is equal to 2, the " _repeat(1)" instruction will force the gram#2[2] rule to be applied two times. If 'Choice' is equal to 3, the rule gram#2[3] will be applied twice because it has an initial weight of 100 which is reduced by 50 after each application. When it reaches zero, the rule is neutralised.